

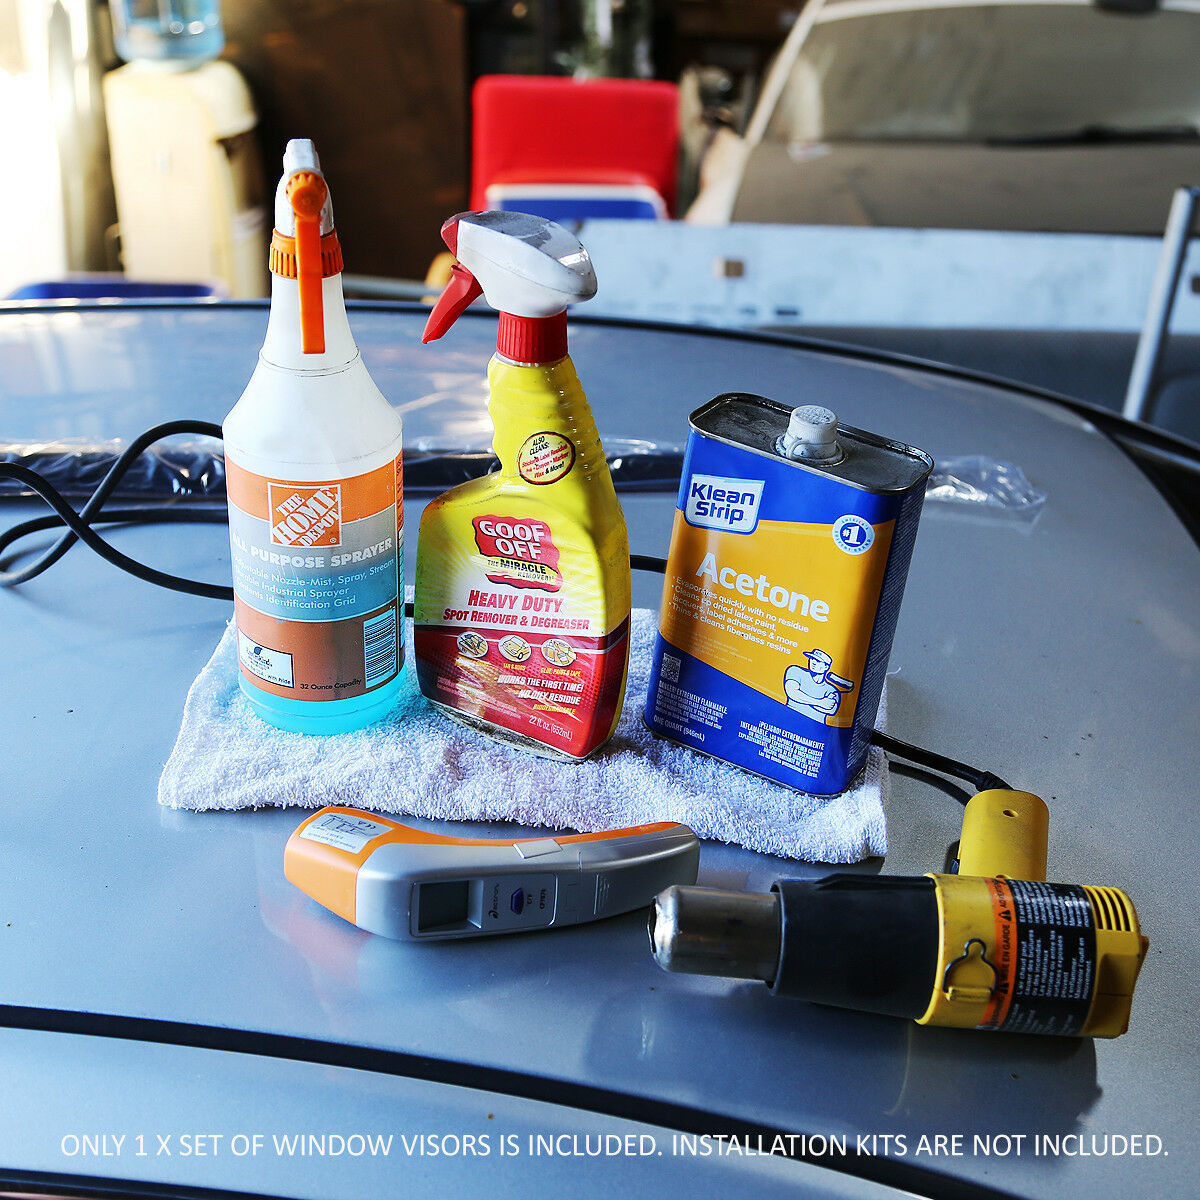
Step 1: Materials needed
a. Clean the terry cloth towels
b. Window cleaner
c. Adhesive remover
d. Acetone
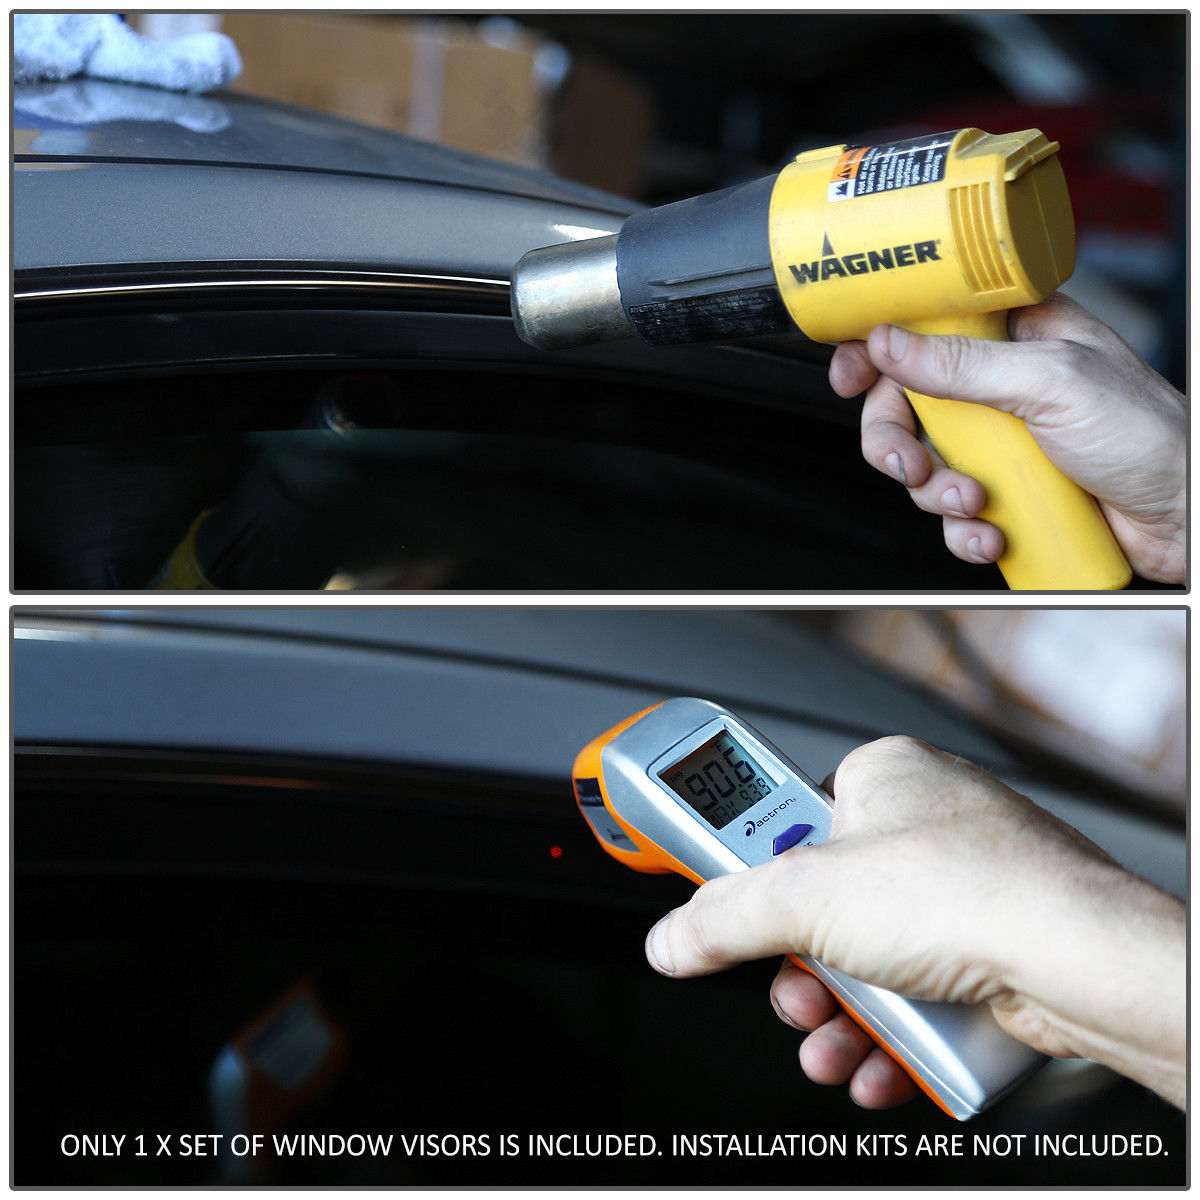
e. Head gun
f. Laser heat gauge
Step 2: Test fitment
Test fit the visor to make sure it is being installed on the correct side and get an idea of the area needed to be cleaned.
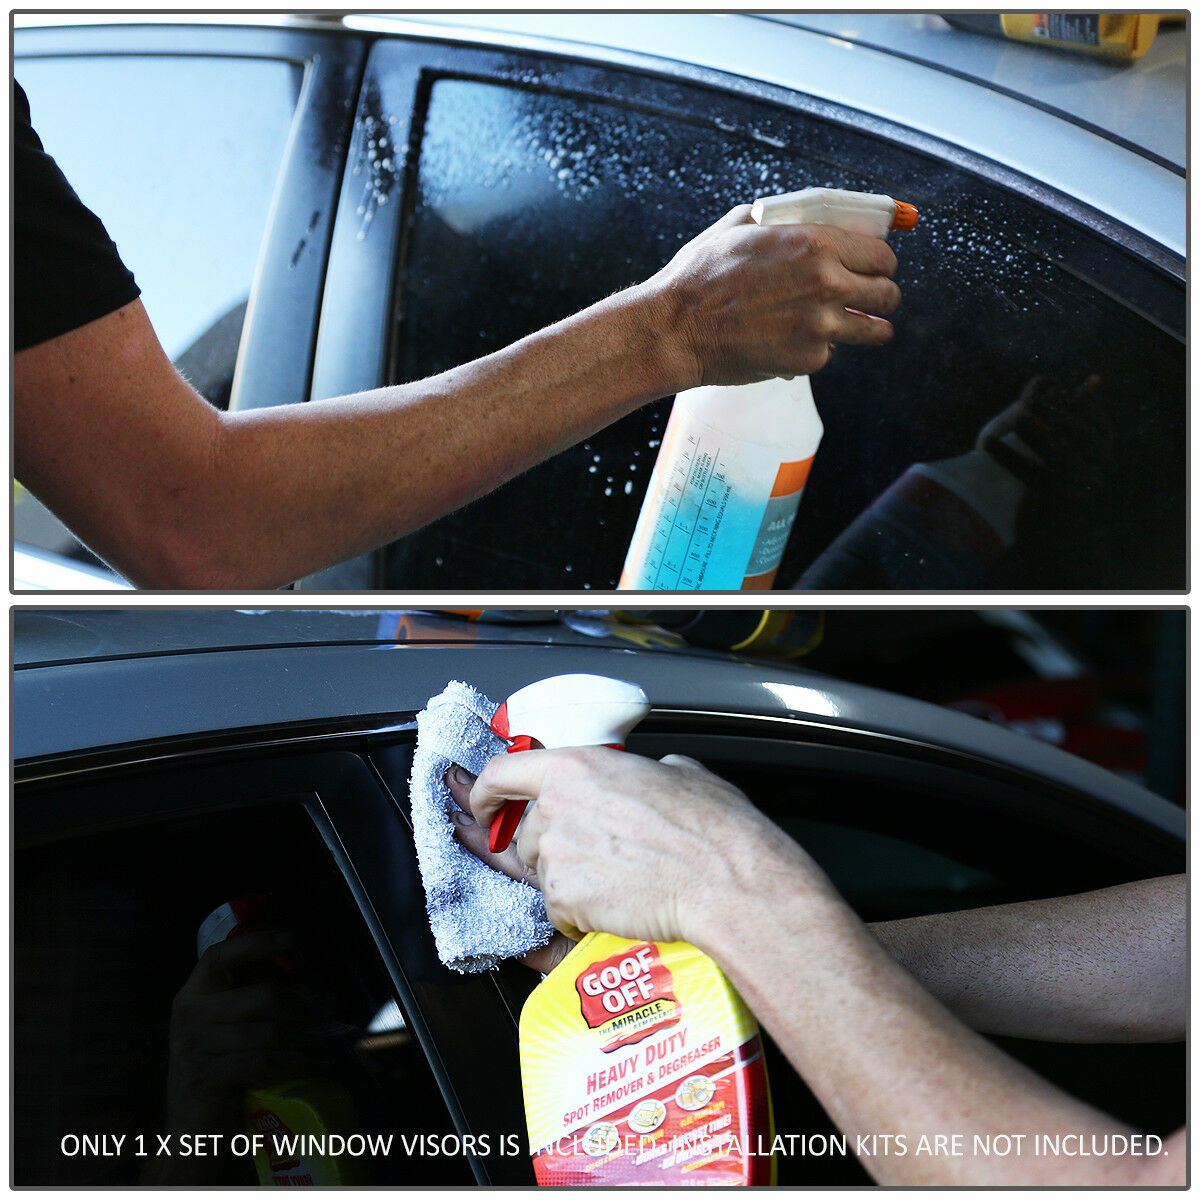
Step 3: Preparing the mounting surface
a. Dirty mounting surfaces can cause adhesive failure and loss of the product
b. Preferably wash your vehicle prior to installation
Step 3:Installation
a.If a heat gun(or hair dryer) is available preheat the mounting surface to approximately 120
Fahrenheit.
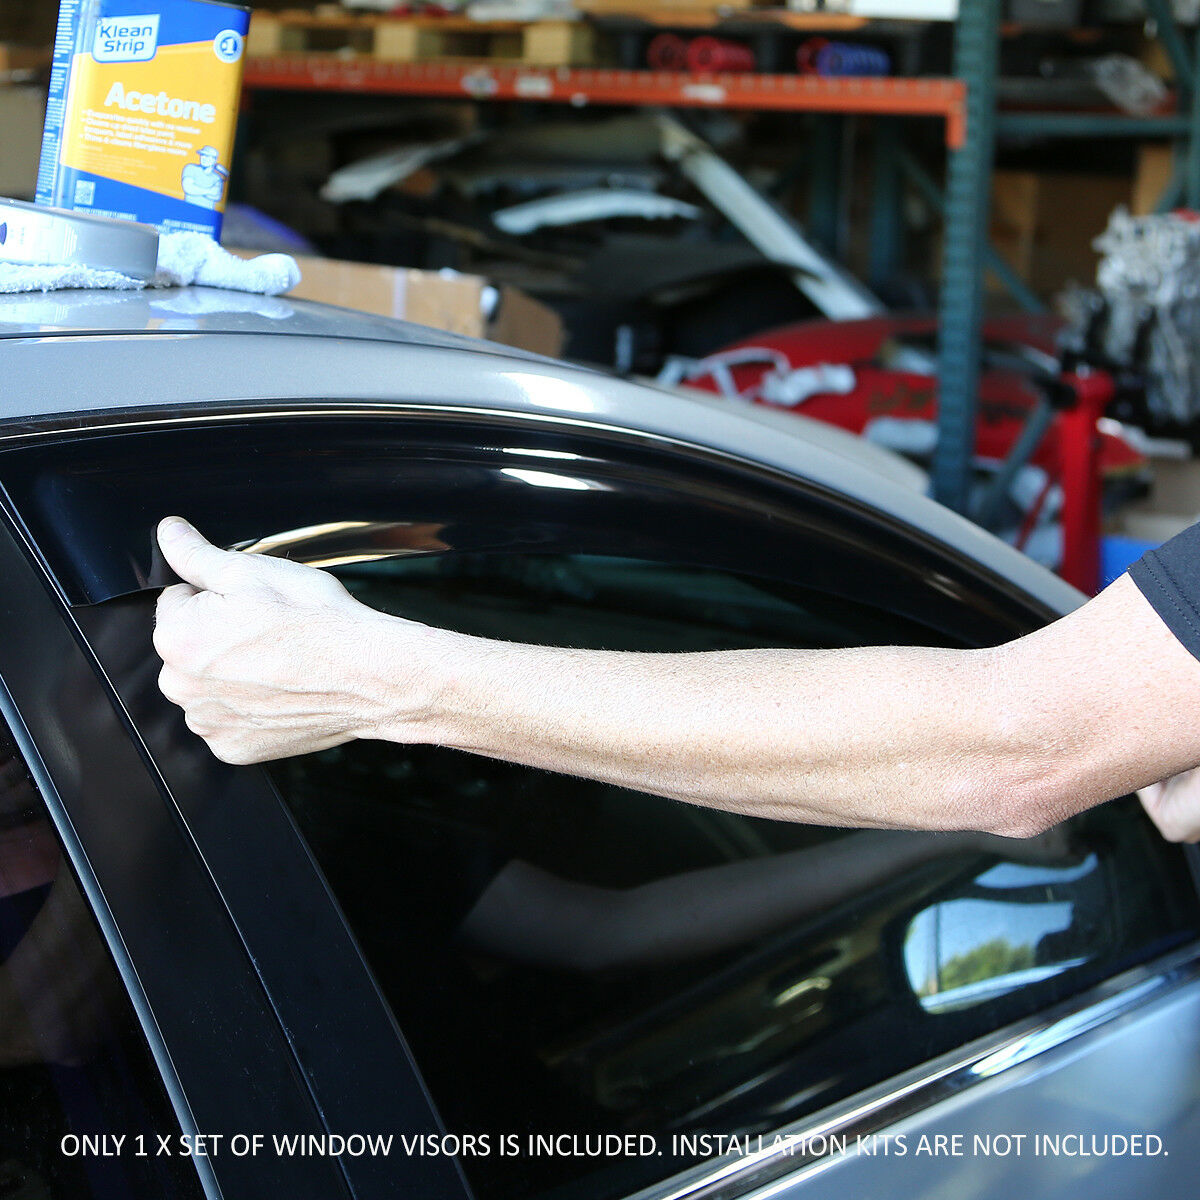
b. Carefully remover the protective backing off the window visor mounting adhesive.

C. Next hod the visor over the are to be installed and line up the visor properly to make sure of he installation angle
d. Attach the visor at one end pressing down firmly with your thumb.
f Once the visor is installed run your thumb firmly over the mounting surface to ensure a good fit.
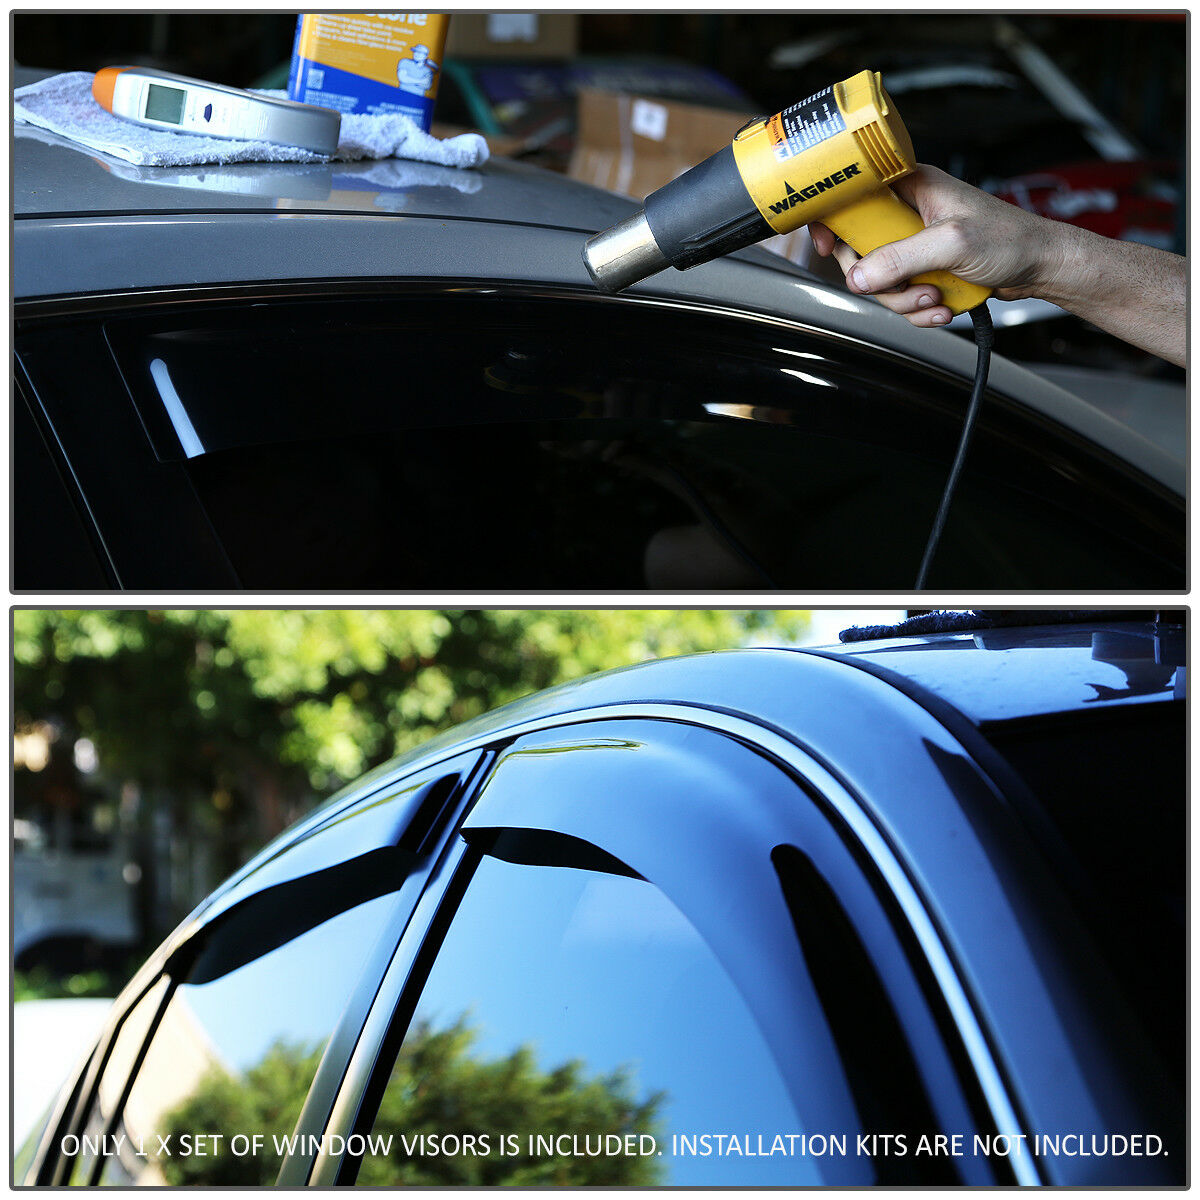
Finally reheat the mounting edge of the visor up to 120 Fahrenheit to futher enhance proper adhesion.
We recommend not washing your vehicle with pressurized water for 48 hours after the visor installation